A little paper magic
Things to Make · About 30–45 minutes · Eight square sheets
Fold one module, then seven more. Join them in a loop, and discover how the pieces slide between a ring and an eight-pointed pinwheel. Start with fairly large, thin paper; thick card makes the joints stiff.
Reading the pictures: dashed lines show creases; rust-coloured arrows show movement. Pale faces show a folded-over layer. Gold and blue distinguish neighbouring modules.
01 Gather your paper
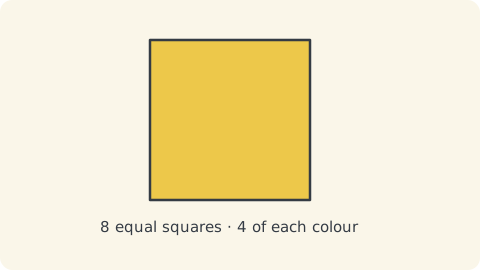
Use eight identical squares of thin paper, ideally 10–15 cm across: four of one colour and four of another. No glue or tape is needed. Double-sided colour is helpful; otherwise begin with the coloured face down.
02 Make an X
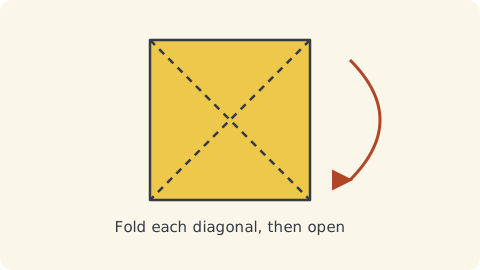
Bring opposite corners together, crease, then open the square. Repeat with the other pair of corners. The two diagonal creases cross at the centre.
03 Add the midlines
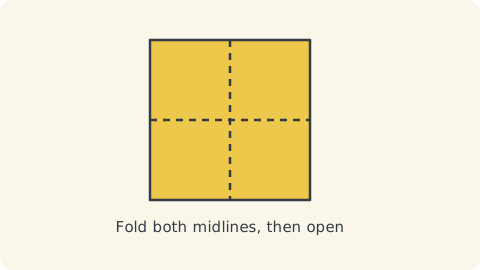
Fold edge to opposite edge in both directions and unfold. You now have four creases through the centre. The diagrams keep the square’s edges horizontal and vertical.
04 Two corners to the centre
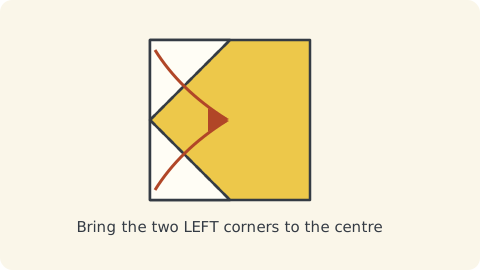
Bring the upper-left and lower-left corners to the centre. Keep the right-hand corners untouched. Crease the two sloping folds firmly; the result has five sides.
05 Fold the pentagon in half
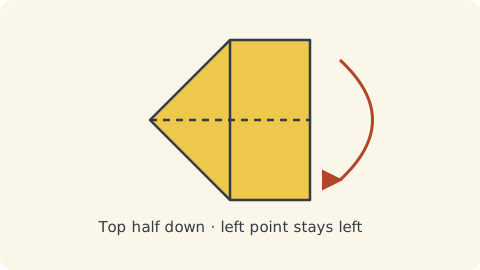
Bring the top half down along the horizontal centre crease. The two folded left corners meet inside. Keep the pointed end on the left. Open this fold slightly for the next step.
06 Push the right end inside
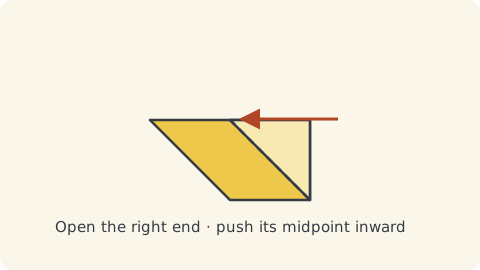
The tricky bit: gently push the midpoint of the original right edge leftwards, towards the paper’s centre. Its two diagonal creases fold inward between the layers. Bring the top and bottom halves together as you do this. This is an inside reverse fold; do not make a new diagonal or simply fold a flap over the outside.
07 Flatten the module
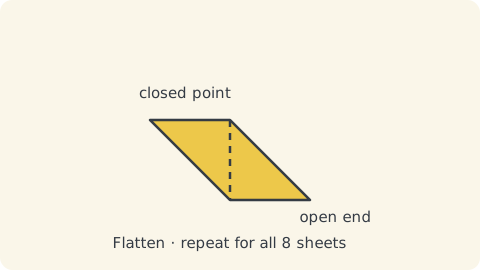
Press flat to get a parallelogram, with a closed point at one end and two separable layers at the other. In this view the open end slopes down to the right. If you have a trapezium, open the right end and try the inward fold again.
08 Make the other seven
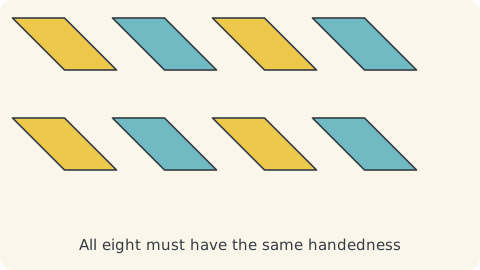
Repeat exactly, always folding the same two left corners. Make four modules in each colour. Lay them in the same orientation to check that their shapes match. Do not mirror alternate colours.
09 Join the first pair
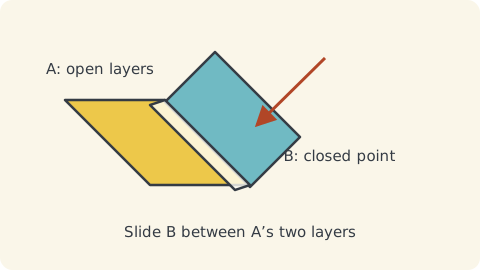
Call the first module A and the next B. Separate A’s two layers at its open end. Place B’s closed point between them, turning B 45° relative to A so the pair starts to curve around a ring. Alternate colours. The close-up spreads the layers for clarity.
10 Tuck the two small tabs
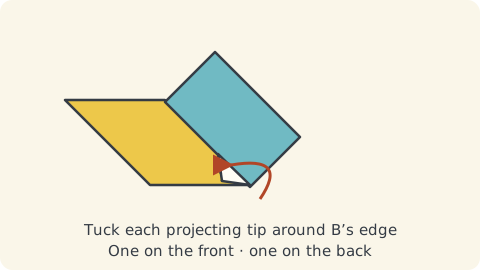
A’s open end leaves two little tips projecting past B’s edge. Fold one over on the front and the other on the back, tucking each into B’s opening. These tips retain the joint while allowing it to slide. Do not fold the whole module around B or squeeze the joint shut. Gently slide the pair a little to check it moves.
11 Close the ring
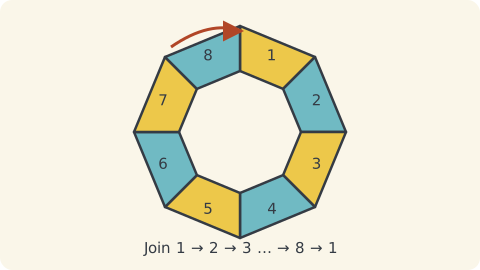
Add C inside B, and continue in the same direction, one joint at a time. With eight modules, join the last open end around the first closed point. Move the neighbouring module aside enough to tuck the final two tips into the first module only. Check all eight joints and spread the ring evenly. Numbers in this schematic show the joining order, not fold lines.
12 Slide towards a pinwheel
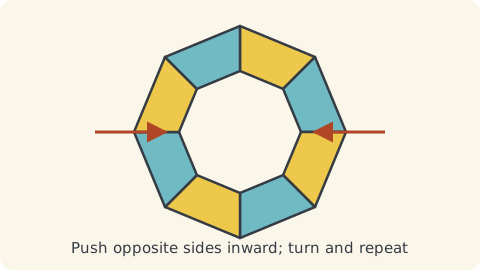
Lay the ring flat. Ease two opposite sides towards the centre a little. Turn it an eighth of a turn and do the same to the next pair. Work around gradually: the hole closes into a filled octagonal centre, with eight swept points projecting around it. Each module slides along its neighbour; there is no extra folding.
13 Open it again
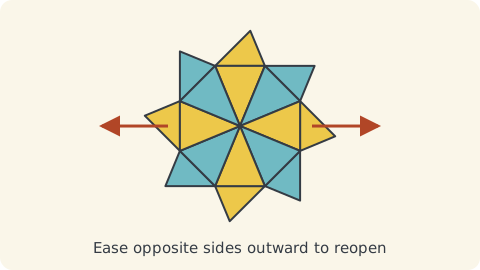
Gently ease opposite sides outwards, working around the model, until the octagonal opening returns. Repeat at your own pace. The closed shape is a pinwheel with overlapping paper faces, rather than a regular star. The ring and pinwheel views are schematic guides to the motion, rather than cutting or folding templates.
Two shapes, the same eight pieces
Keep it flat and let each joint travel a little at a time. The colour panels indicate the eight modules; these overview drawings simplify their overlapping layers.
If it needs a little persuasion
My module is the wrong shape
Check that only the two left corners went to the centre. The right-edge midpoint must collapse inside on its existing diagonals. Compare all eight modules before assembling; every one should lean the same way.
The ring falls apart
Check both tabs at each joint: one front and one back. They should hook into the next module, rather than sit loosely on its surface. At the final joint, avoid catching the second module inside the first.
It will not slide
Stop pulling hard. Look for a tab caught in the wrong layer or a joint pressed too tightly. Ease each connection separately, and spread movement around the ring. Crisp, accurate folds and thinner paper usually help.